Showing posts with label Windows7. Show all posts
Showing posts with label Windows7. Show all posts
Thursday, August 25, 2011

How to Remotely Shutdown Windows 7 Computer
This article will tell you how to remotely shutdown or restart a Windows 7 PC using the Remote Shutdown Dialog box or command line.
Using the Remote Shutdown Dialog box, you can remote shutdown, restart or log off local or networked computers, quite easily.
To open the Remote Shutdown Dialog box, open a command prompt, type shutdown -i and hit Enter.
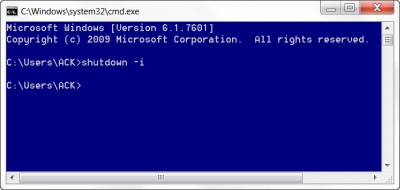
The Remote Shutdown Dialog window will open.

Next select the command. I have selected Shutdown and allowed for a 60 seconds time span before shutdown commences. You can also give a message, which will be displayed before shutdown commences.
Once done, click OK.
You can also document the reason for an unexpected restart or shutdown of a remote computer without logging on locally to that computer.
Do note that:
· To send commands to other PC’s you will have to have administrative privileges on those computers as well
· For Shutdown Event Tracker to be able to record information, the Remote Registry service must be enabled on the remote computer
· The Remote Administration and Windows Management Instrumentation firewall exceptions must be enabled on the remote computer.
Wednesday, August 24, 2011
CS Menu- Get Classic Start Menu in Windows 7

CSMenu is a little application which acts like the classic start menu. It's designed for Windows 7, which doesn't have a classic start menu.
For CS Menu visit: www.csmenu.com
Courtesy : http://doputtur.blogspot.com/
Monday, August 22, 2011
How to Share and add Network Printer in Windows 7
Sharing printers and adding a network printer is very easy in Windows 7. If you have a printer attached to your computer, you can share it with anyone on the same network. You can control who will access the printer or who will not in the network.
But printers that are directly connected to a network rather than attached to a computer are available to anyone on the same network. These printers must have a network port or wireless connection that allows them to connect directly to the network.
You can share a printer by following these few steps. First of all, attach the printer, power it on and then continue with the following steps:
Turn the file and printer sharing ON
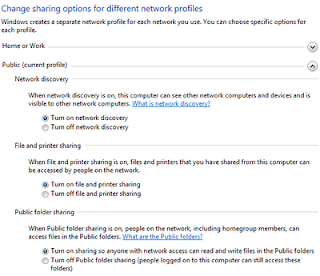
1. Go to Control Panel\Network and Sharing Center\Advanced sharing settings.
2. Click the chevron to expand the current network profile.
3. Under File and printer sharing, select Turn on file and printer sharing, and then click Save changes.
4. Now you need to share the printer.

4. Now you need to share the printer.
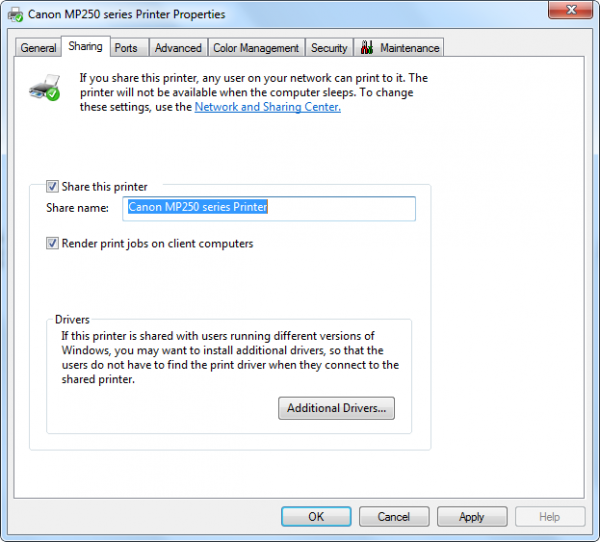
To share your printer
1. Go to Start and open Devices and Printers.

3. Click the Sharing tab, and select the Share this printer check box.

Your printer is now available for other people on your network. All they need to do is add a network printer to their computers.
1. Go to Start and open Devices and Printers.

Your printer is now available for other people on your network. All they need to do is add a network printer to their computers.
To add a network printer
1. Go to Start and open Devices and Printers.
1. Go to Start and open Devices and Printers.
2. Click Add a printer.
3. Click Add a network, wireless, or Bluetooth printer, click the shared printer, click Next, and follow the instructions on the screen.

4. Once the printer will be successfully installed, you can use it.
Courtesy : http://www.thewindowsclub.com/
3. Click Add a network, wireless, or Bluetooth printer, click the shared printer, click Next, and follow the instructions on the screen.

4. Once the printer will be successfully installed, you can use it.
Courtesy : http://www.thewindowsclub.com/
Subscribe to:
Posts (Atom)